- For Photographers
MY SET UP
I often get asked what I use to get a more dramatic images. Well, this is how I do it! 🙂 I love taking a off camera flash aka Speed Light with me on all sessions! I use a very cheap and simple set up that anyone can afford! Yongnuo Flash & Wireless Trigger Flashes They are easy to work and cost effective. I like to have these on location and weddings. I have had my very expensive $500.00 flashes knocked over or thrown in the wind and in a matter of seconds be completely destroyed. I love that the wireless system controls act as a Trigger & a Receiver! They are interchangeable. I typically have 2-3 flashes for a portrait session and 3-4 at weddings. 🙂 I keep 8 triggers in my wedding suitcase at all times!! See what else is in my BAG.
I have someone assisting me on all sessions which makes it much easier to customize where your light is quickly! If you do not have an assistant to hold your light then you can always get a portable Nano Stand by Manfrotto. They are portable and light! Be aware that they are very light and can easily blow over! They are great for carrying on airplanes or tracking across the big city!
MY EDIT
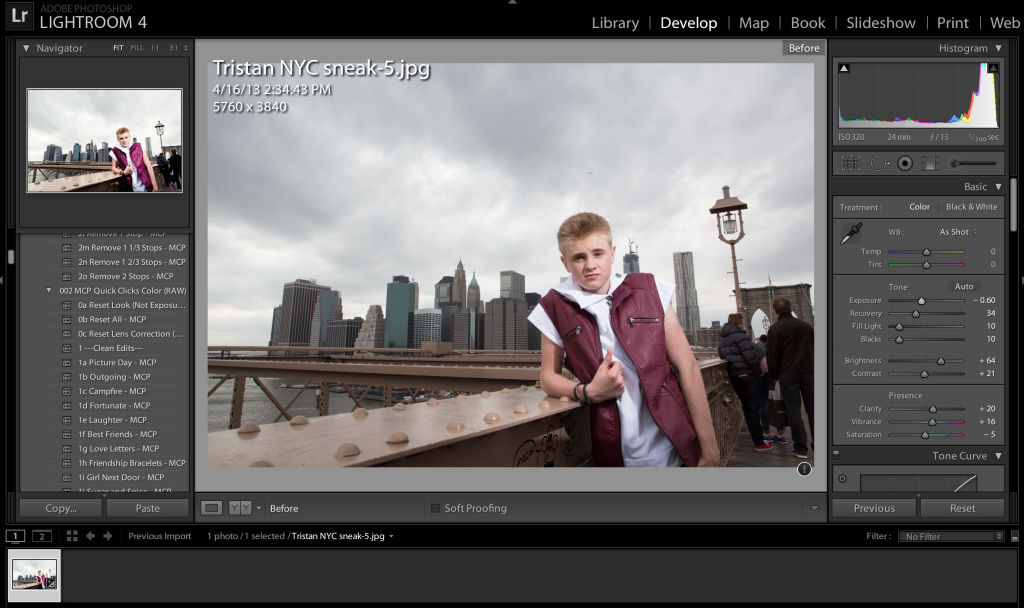
Once upon a time I would spend hours editing photo shoots in Photoshop, but I soon learned that my time is precious and decided to invest in Lightroom 4. Here is a quick review on how I took a camera from RAW to final edit!
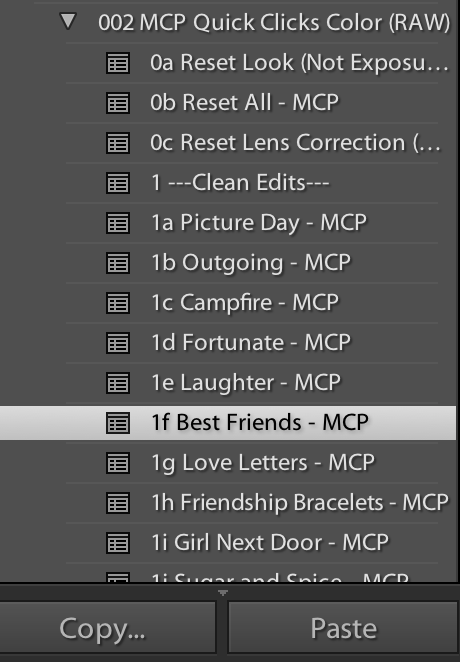
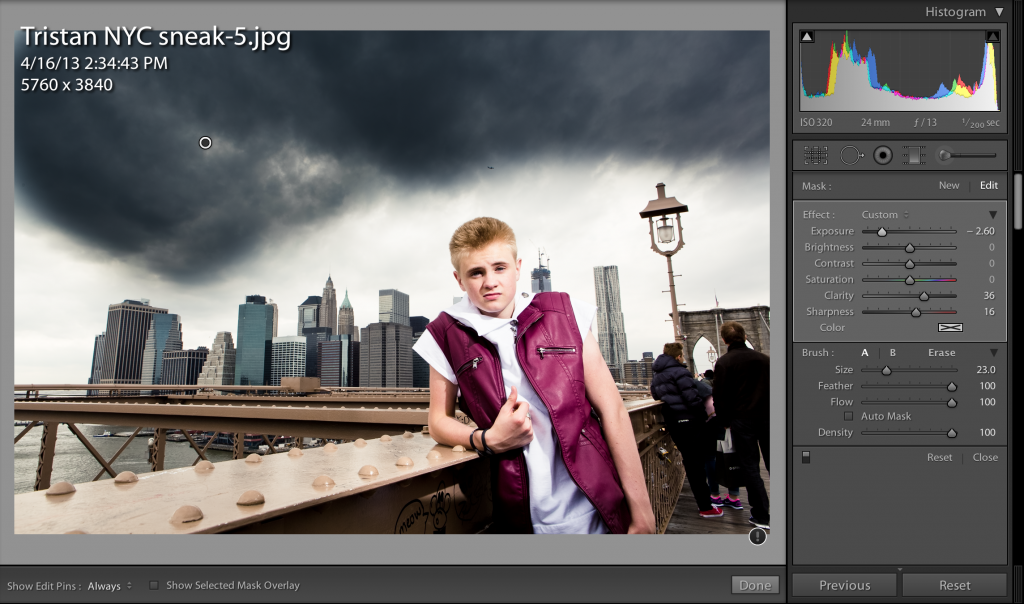
- Import image into Lightroom 4. I use MCP Actions Quick Clicks to start the edit and choose “Best Friends”. The RAW image is shot in Auto WB and evenly exposed for the clouds and the clients skin. Clouds are really fun when you are working with Off Camera Flash. Often times when you work with no flash you are exposing for the clients skin and the clouds get blown out. The flash is going to allow the clouds to really stand out! You can see my settings on the upper right of the photo under the Histogram.
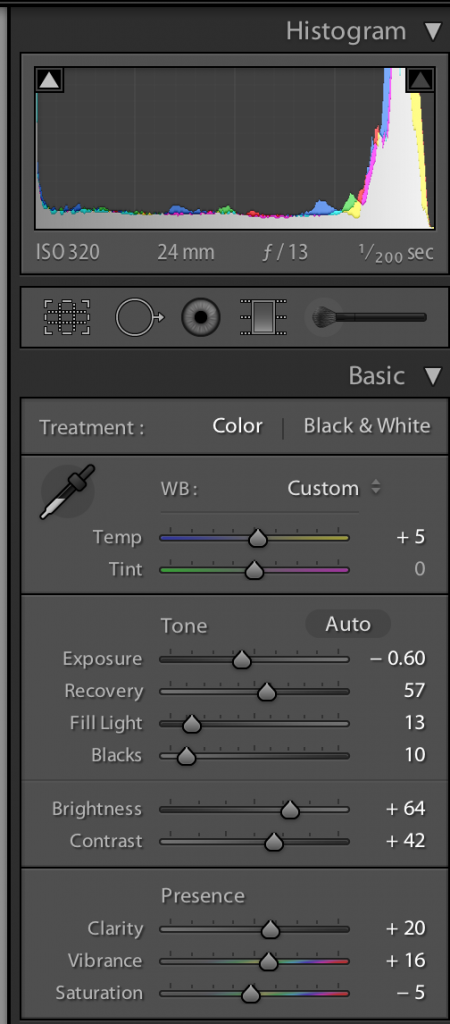
- After choosing my preset I then go into the right hand editing bar and start to customize my image. I often adjust the Exposure, White Balance, Fill Light, and always add Contrast and Vibrance. Controlling the Clarity will sometimes cause your clients skin to get to detailed. So be aware when working with women to not go too far
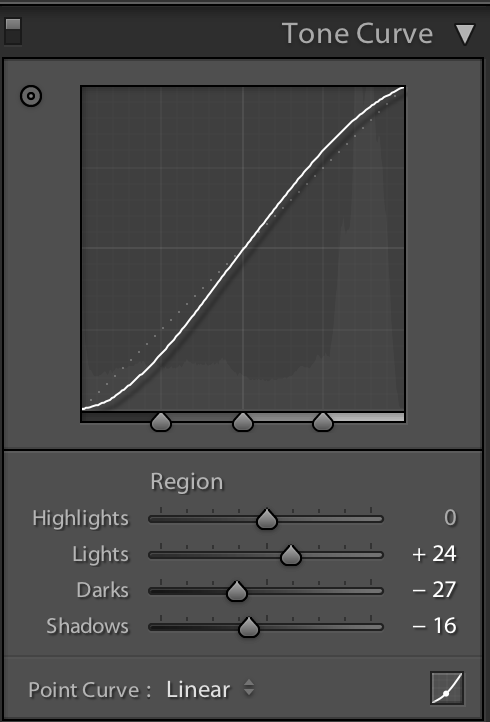
- ALWAYS ALWAYS ALWAYS Use the Tone Curve. It really starts to make the image POP. Deepens the dark and brings up the lights. I feel like it ‘pulls’ the photo and creates depth.
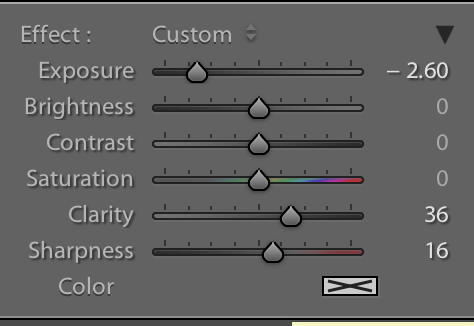
 If you haven’t’ discovered the brushes in Lightroom- you are missing out!! This is a great way for me to dramatize the clouds quickly! I select the BRUSH and then adjust the EXPOSURE on the Brush to be a negative. I want to make it dramatically UNDEREXPOSED so I can see where my brush is painting aka Masking. I can then see exactly where I am painting the Exposure change on! After I paint the clouds darker I can then adjust the EXPOSURE in the Brush tool to my liking.
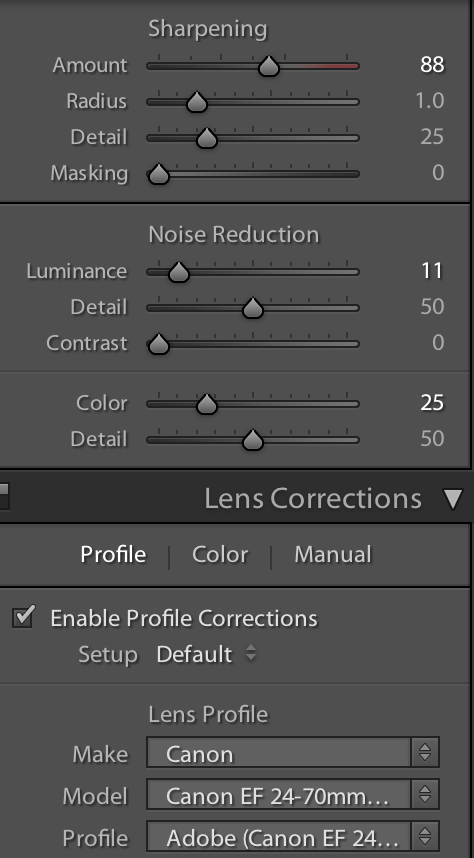
 Finally I go into my final touches by adjusting the Sharpness, Noise and making sure to correct the Lens for any distortion around the edges. Sometimes this distortion will leave a vignette I do not want.
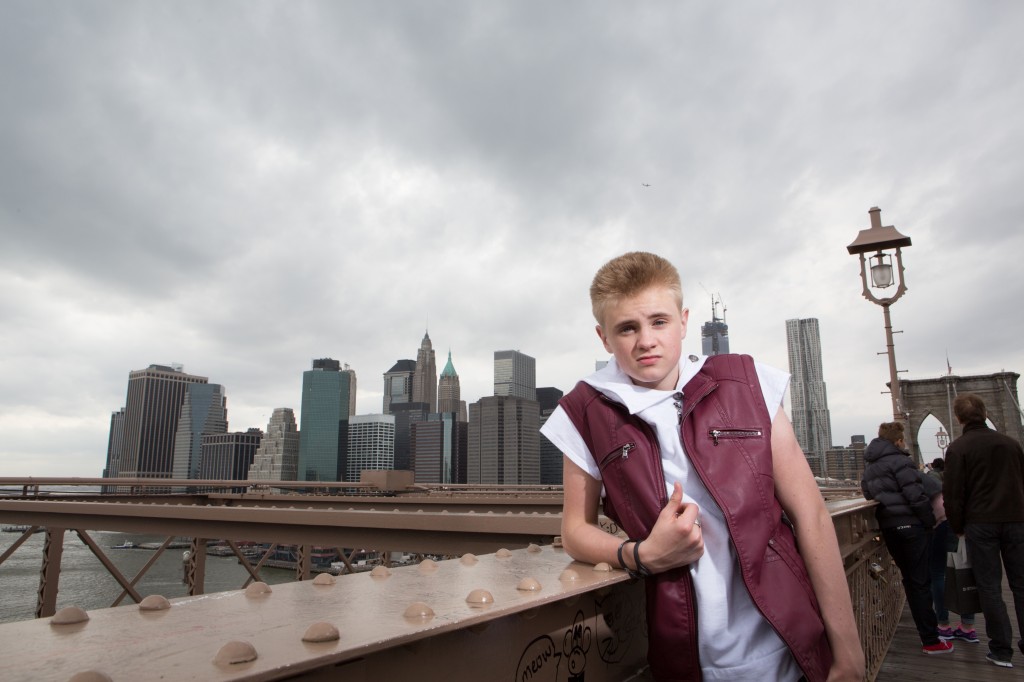
BEFORE & AFTER of one of my favorite images from TRISTAN BLAINE in NYC.

I hope this helps you out in some way! Lightroom is a powerful tool! Learning to edit quickly is part of my brand. There are million ways to edit and make your images amazing. I would love to hear your techniques and ideas as well. Sharing is something the world needs more of!
xx
Leaha
Click “Like” to let us know you were here! AND Please excuse the crazy bullet points in this post! 🙂 ha